How to Set up SSH and Generate an SSH Key on Windows 11 (for Use With GitHub)
In the Linux world it is pretty common to use SSH keys to log into servers. They are harder to break than passwords of typical length and also save you from typing your password every time you log into your server. SSH keys can also be used with Git servers like GitHub to authenticate yourself when you are pushing to or pulling from a repository.
On Windows 10 and Windows 11 it’s also possible to set up SSH and generate an SSH key without any external tools. In this tutorial I’m going to show you how to do this. Additionally, I’ll also show how to configure your newly created SSH key in GitHub, so that you can use it to push to and pull from git repositories.
Making sure that the OpenSSH client is installed
Windows 11 has it’s own OpenSSH client. In my case it was already installed on my computer, but here is how to check for that:
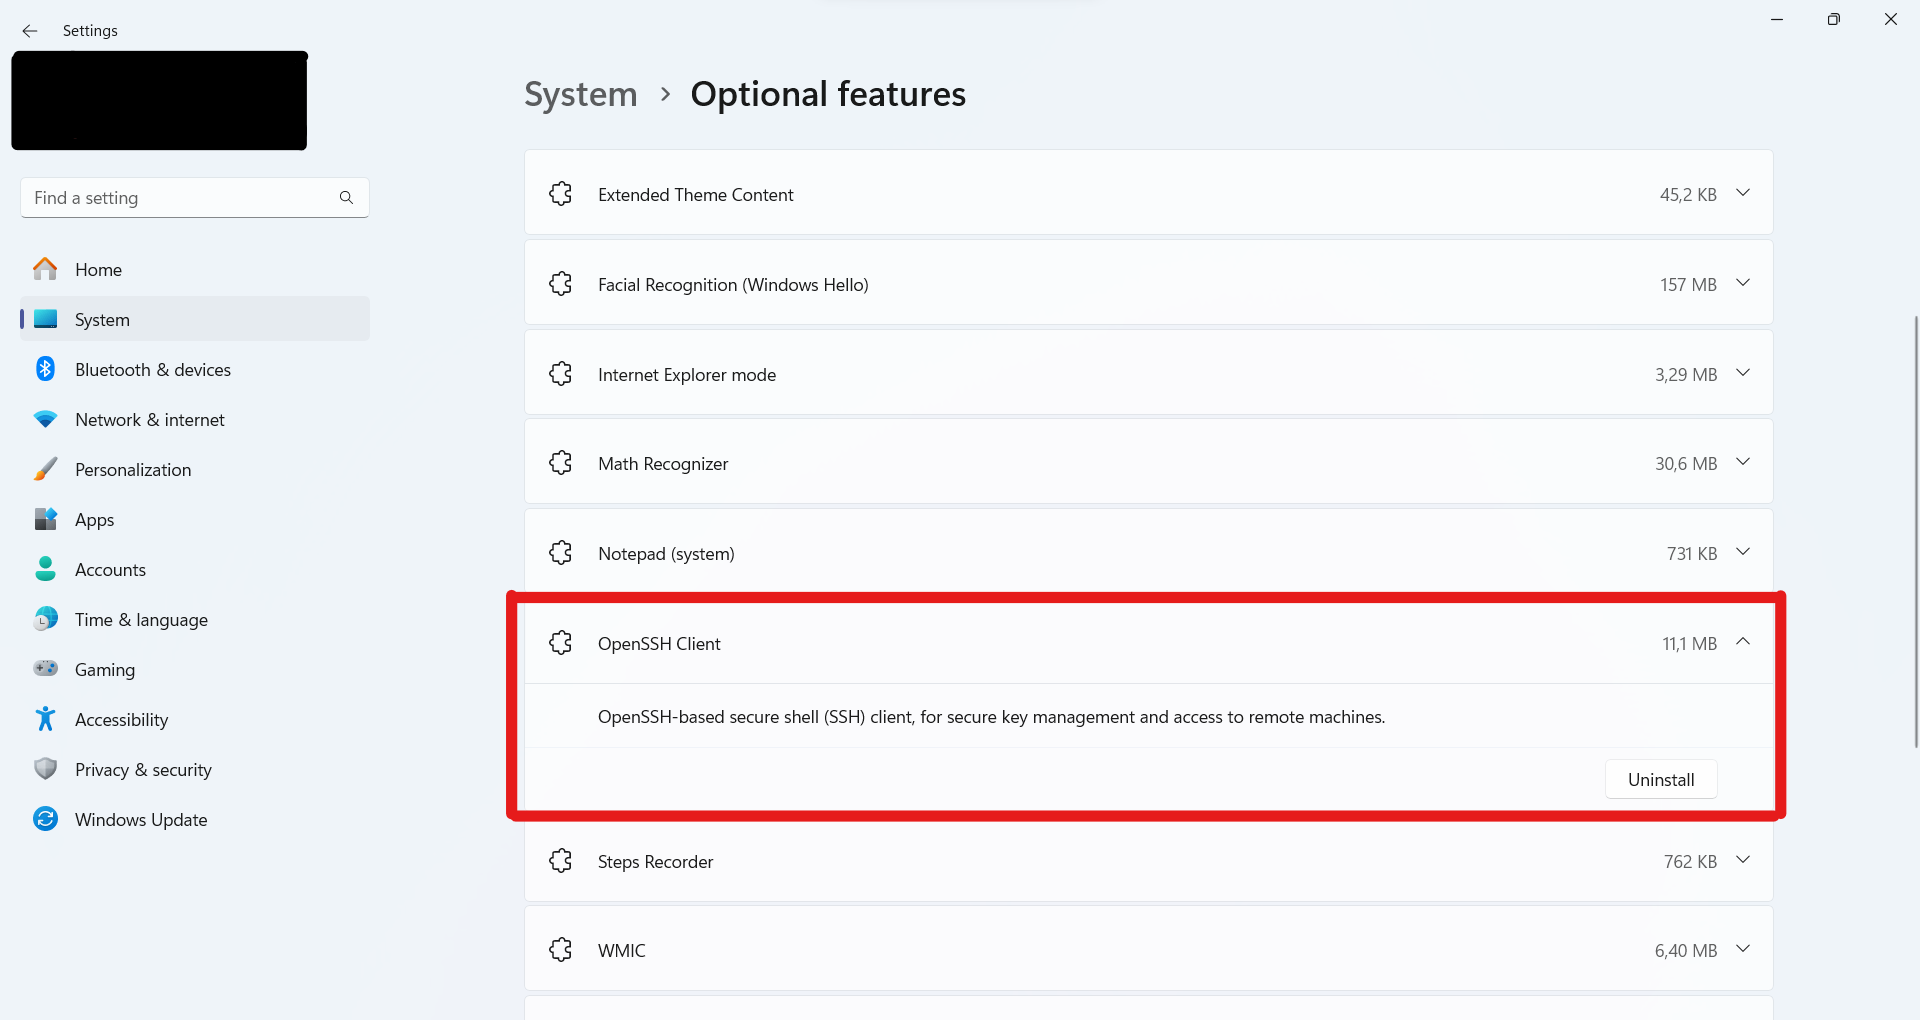
- Go to Settings -> System -> Optional Features.
- Scroll to “OpenSSH Client” and click on the item.
- If it shows an “Uninstall” button, then OpenSSH is already installed and you can skip to the next section.
Otherwise scroll to the top of the settings page and click “View features” in the “Add optional feature” item. Then scroll to “OpenSSH Client” (NOT OpenSSH Server) and tick the box. Click “Next” and then click “Install”. After the installation you can close the settings window.
Enabling the SSH Authentication Agent
Next we need to enable the SSH Authentication Agent which holds the SSH keys and makes them available to the SSH client.
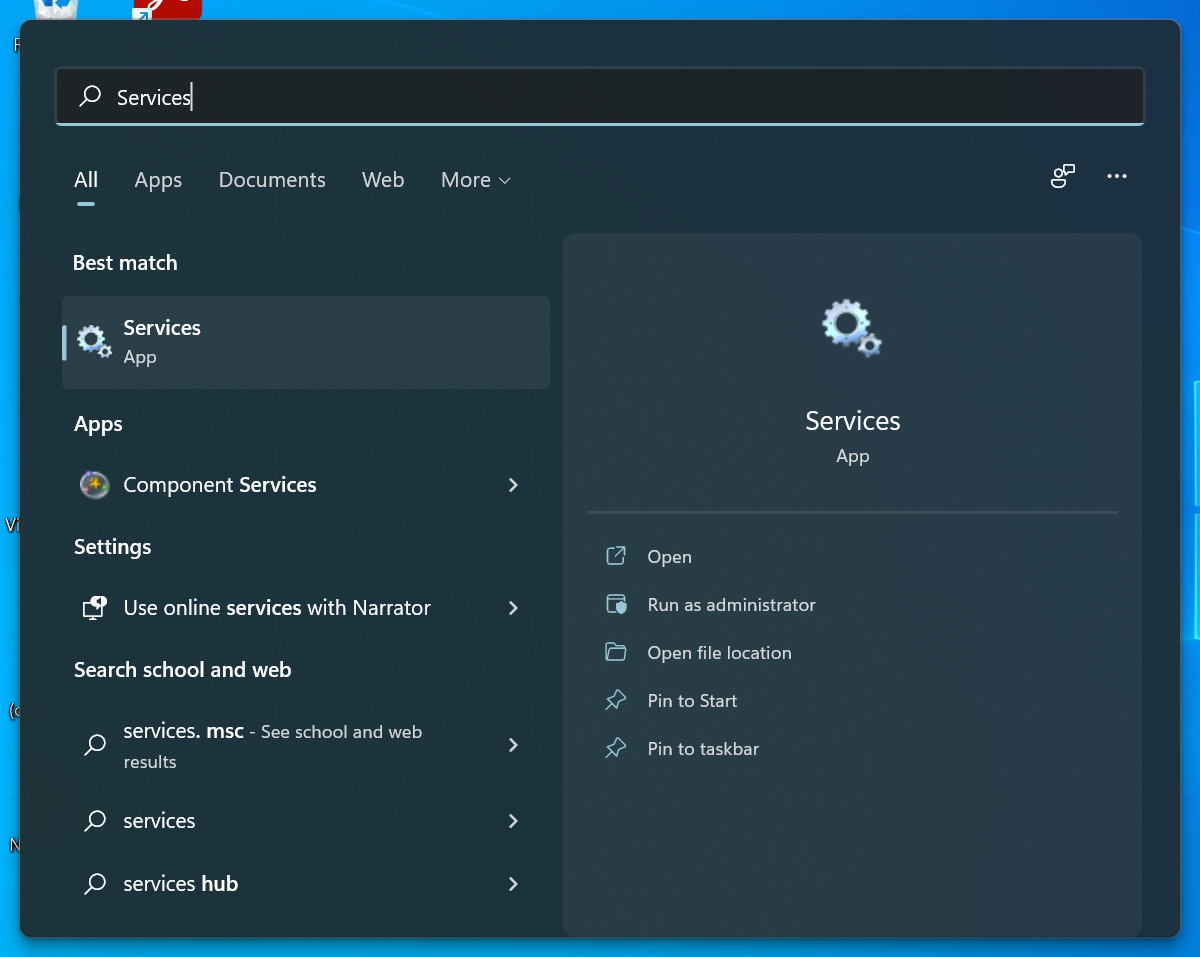
Open the start menu and search for “Services”. Then open the suggested program.
Now scroll to “OpenSSH Authentication Agent”.
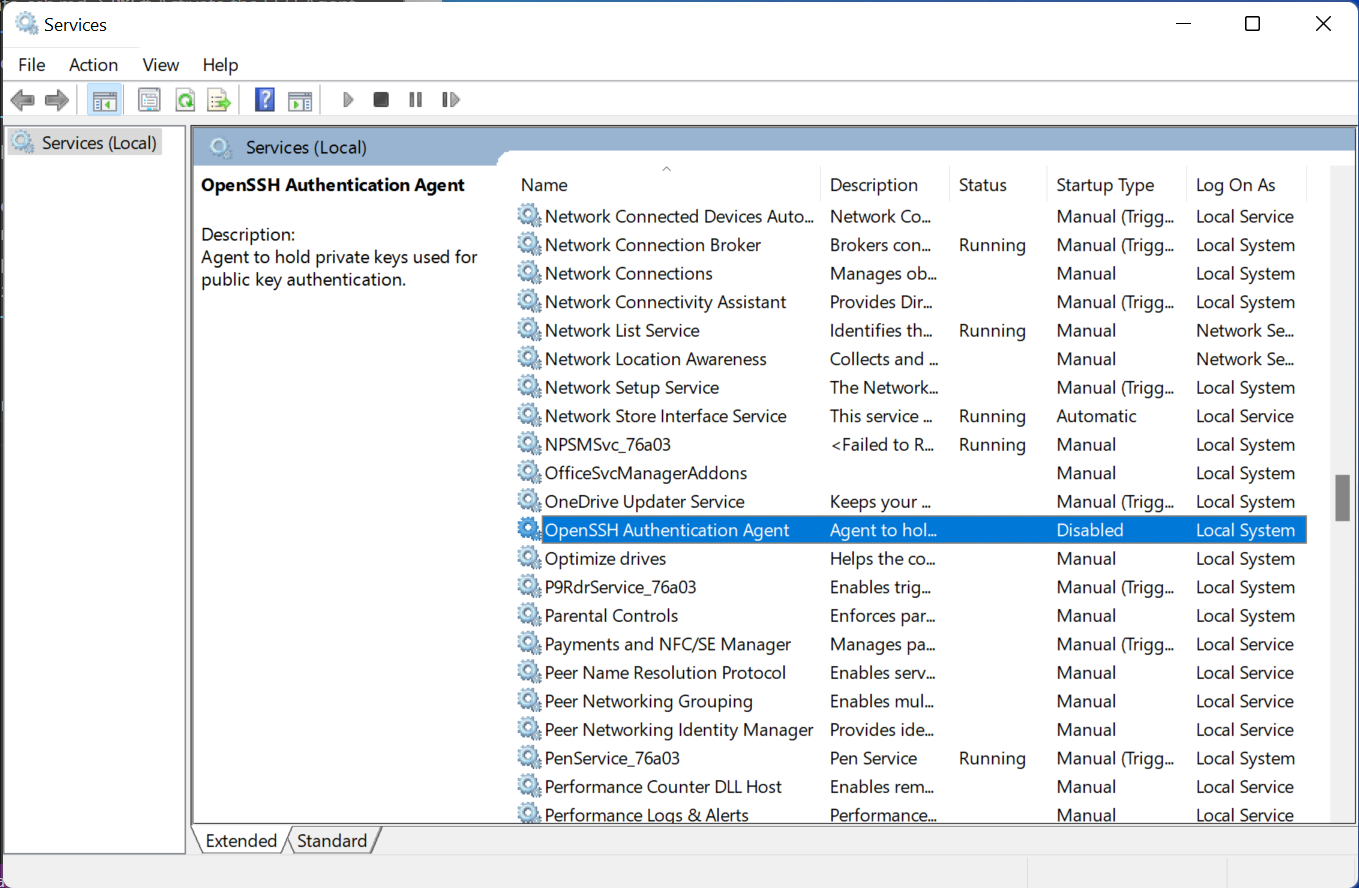
Double-click the entry. This opens a properties window. The startup type is currently set to “Disabled”. Set this value to “Automatic (Delayed Start)”. This means that the SSH agent will automatically start when you boot your PC.
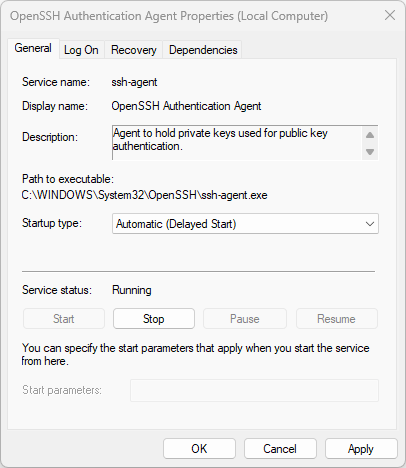
Now click “Apply” and click the “Start” button to start the service immediately. Click “OK”. You can now close the Services window.
Generating the SSH key
Open CMD by pressing Win+R, typing “cmd” and then pressing enter. Then navigate to the “.ssh” folder in your home directory by entering:
> cd .ssh
This folder will store all your SSH keys. Next, enter
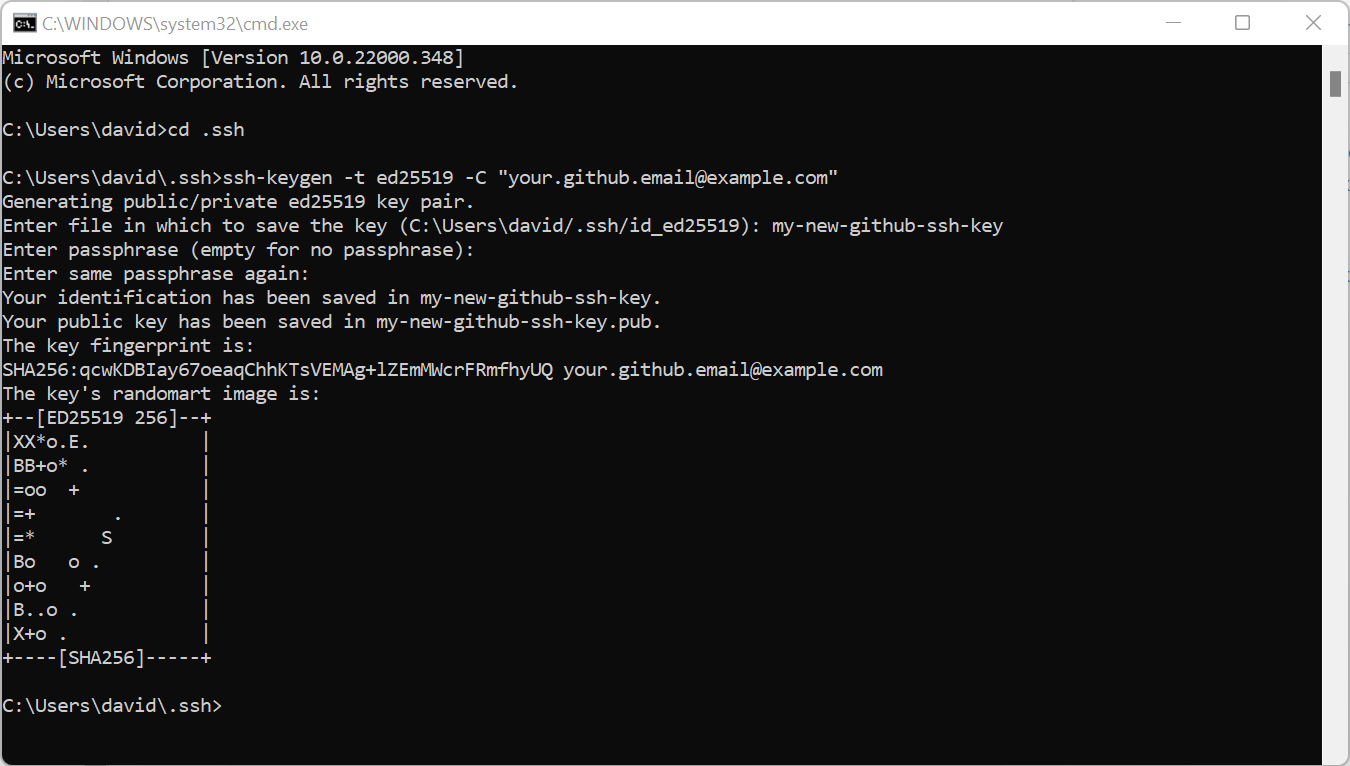
> ssh-keygen -t ed25519 -C "your.github.email@example.com"
and replace the email address with either your own email address or some other descriptive string. This is supposed to describe what this key is for. If you intend to use the key for GitHub, enter the email address you use for your GitHub account. This command generates a new SSH key on your machine.
Afterwards, enter a filename for the SSH key. Use something descriptive like “my-new-github-ssh-key”.
If you wish, you can now enter a passphrase that you need to enter when using the generated key. In most cases you won’t need a passphrase. So just press Enter twice.
Your SSH key has now been generated.
- Your private key is in
C:\Users\%username%\.ssh\my-new-github-ssh-key - Your public key is in
C:\Users\%username%\.ssh\my-new-github-ssh-key.pub
This is the complete console input so far:
Adding the SSH key to the SSH agent
Now we have generated an SSH key but the SSH agent does not know yet that it exists. So we need to add this key to the agent.
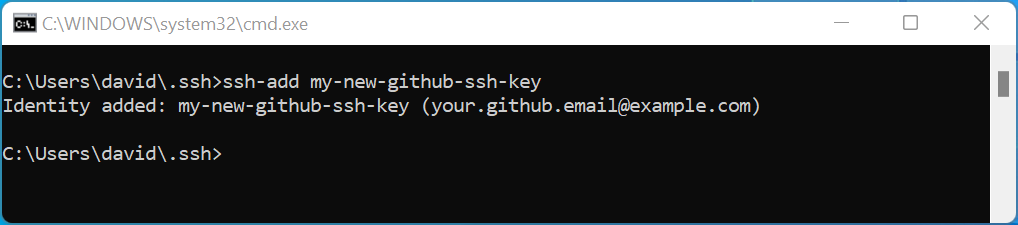
In the same command line window that you opened in the previous step enter the following command:
> ssh-add my-new-github-ssh-key
Replace the my-new-github-ssh-key with the file name that you entered when generating the key.
The console should now say “Identity added” to confirm that your key was added to the agent.
Now your new key is ready for use. You can either use it to log into a server via SSH or to access git repositories.
Optional: Adding the key to your GitHub account
If you plan to use this key for access to GitHub repositories, you need to add this key to your GitHub account.
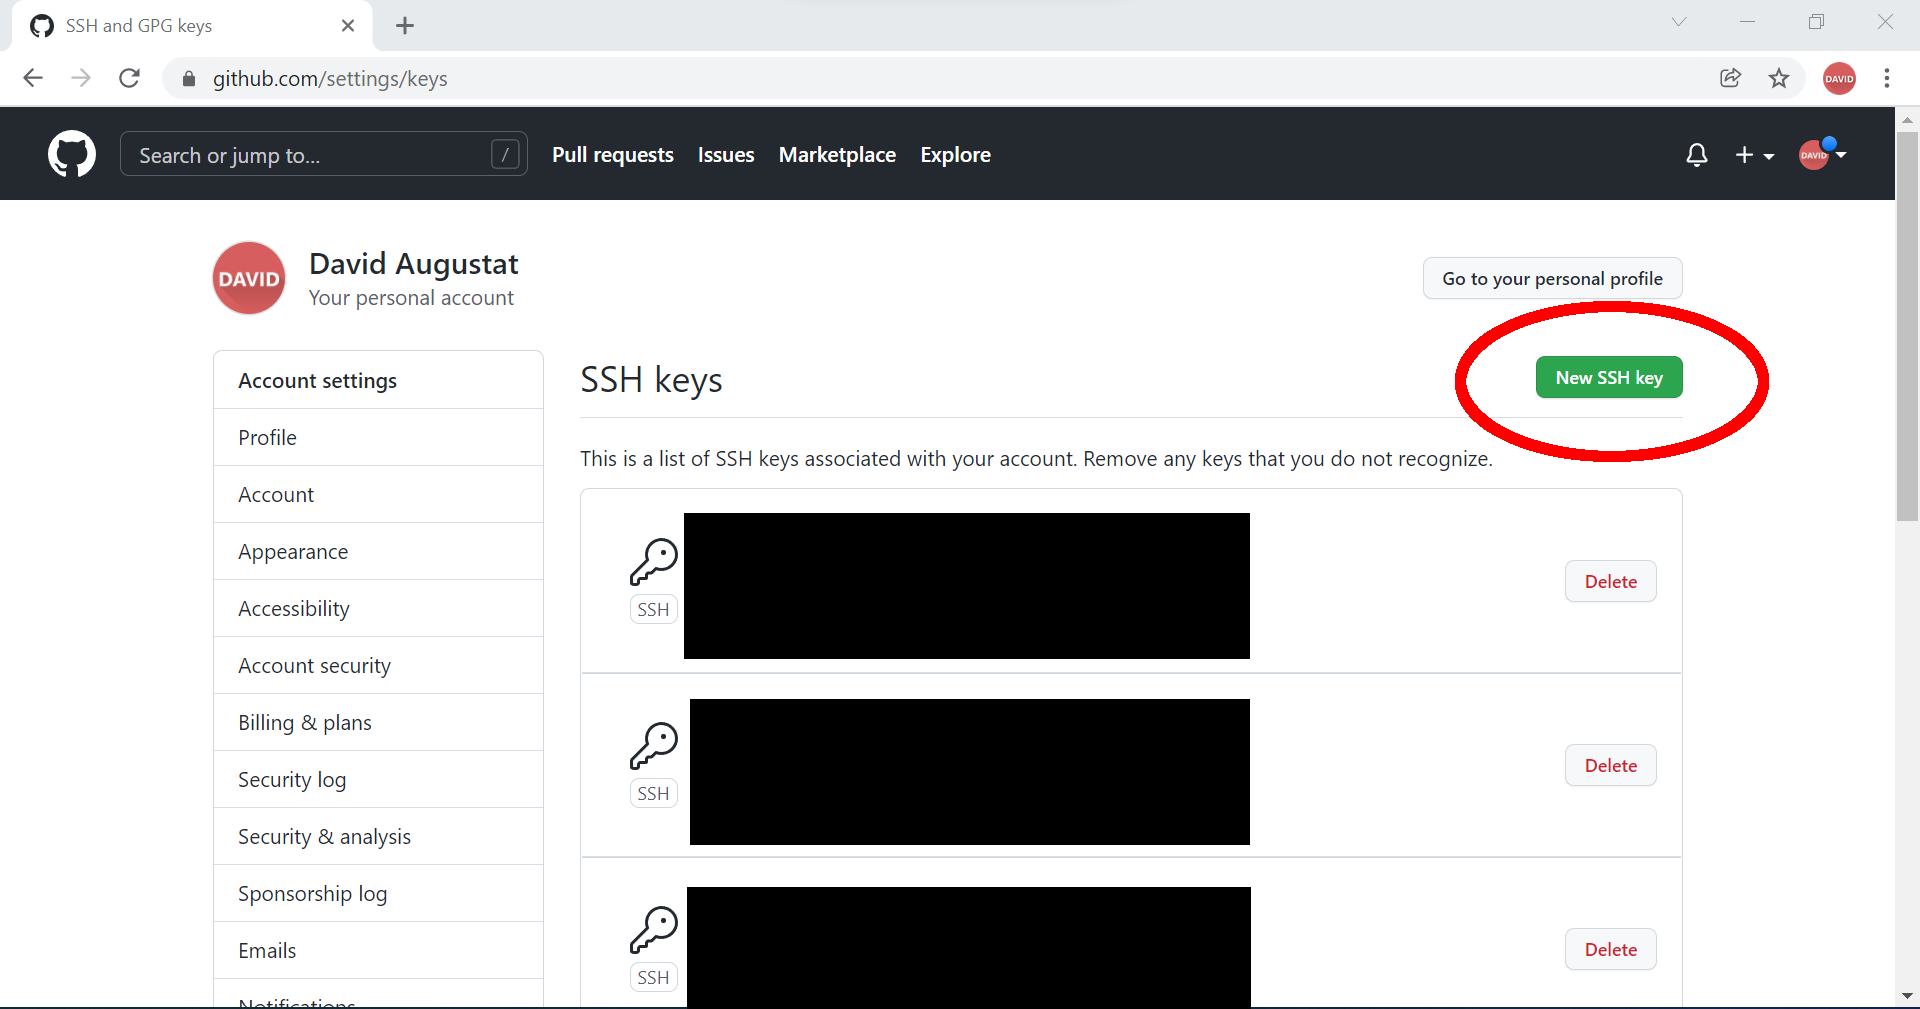
First, go to the SSH and GPG keys section of the GitHub settings and click “New SSH Key”.
Open your public key file C:\Users\%username%\.ssh\my-new-github-ssh-key.pub in a text editor (do not open it in Microsoft Publisher). Mind the “.pub” at the end of the file name which marks that it is the public key.
The file should look like this (with a different key of course):
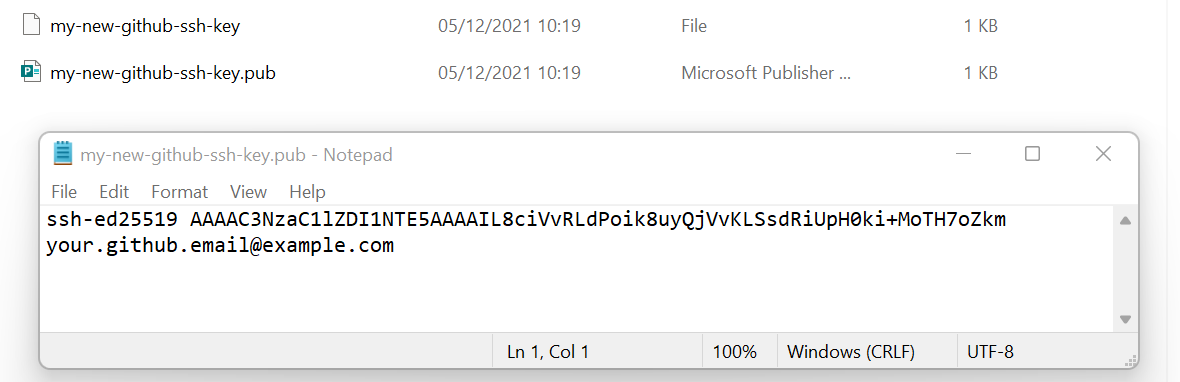
Now copy the entire content of the file and paste it into the “Key” input field on GitHub. Enter a descriptive key name and click “Add SSH key”.
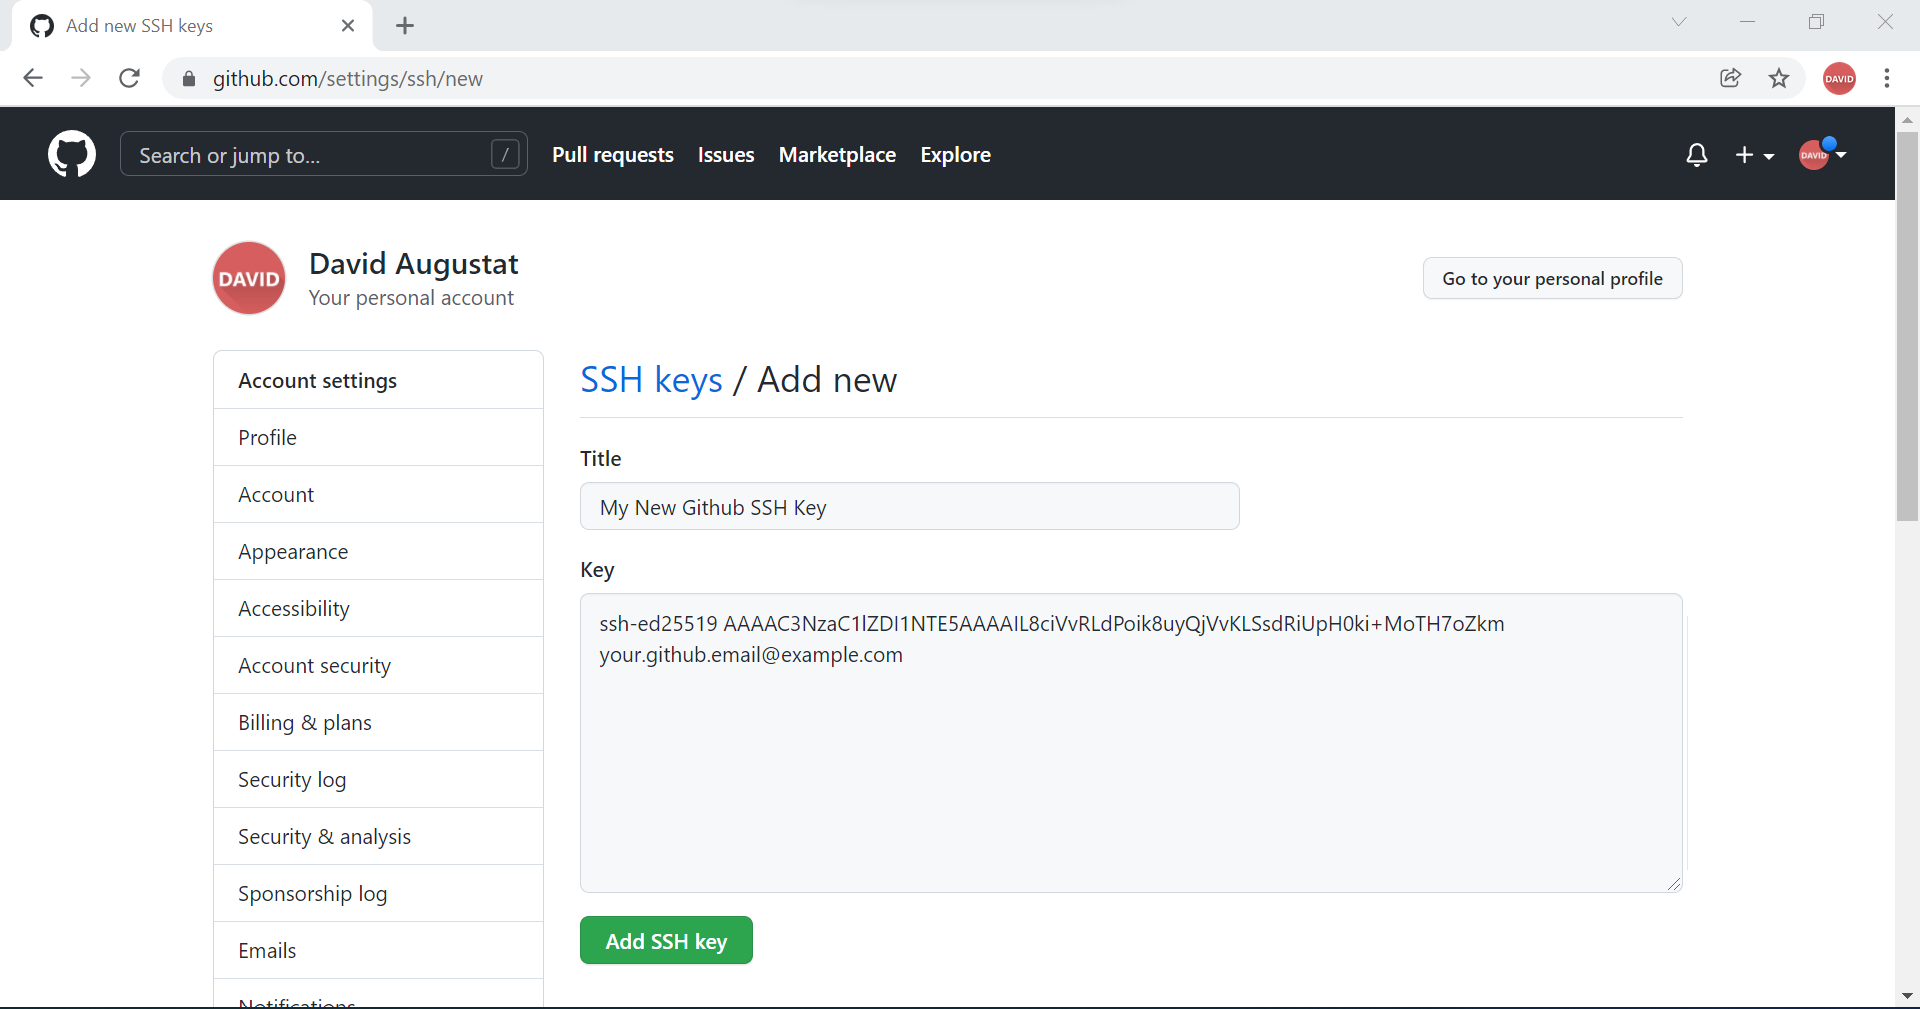
You should now see your key in the list of SSH keys on GitHub.

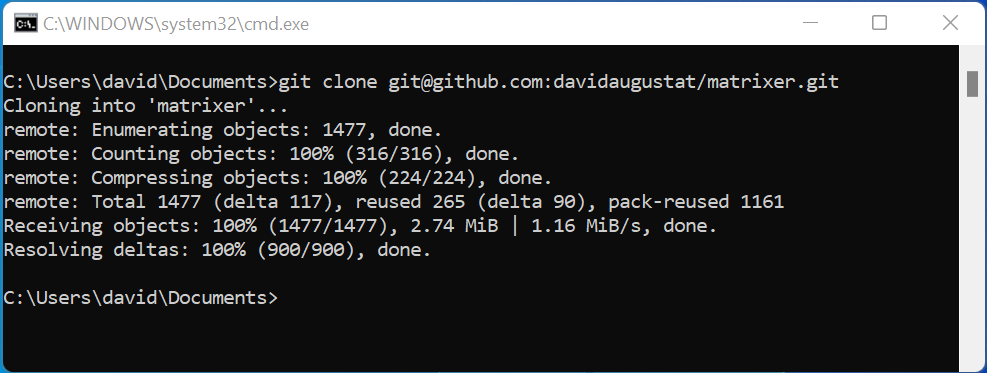
Using the key to push and pull
You can now use the generated key to push and pull without entering your password. Please note that you need to have Git for Windows installed on your system for this. If you haven’t yet, you can download Git for Windows here.
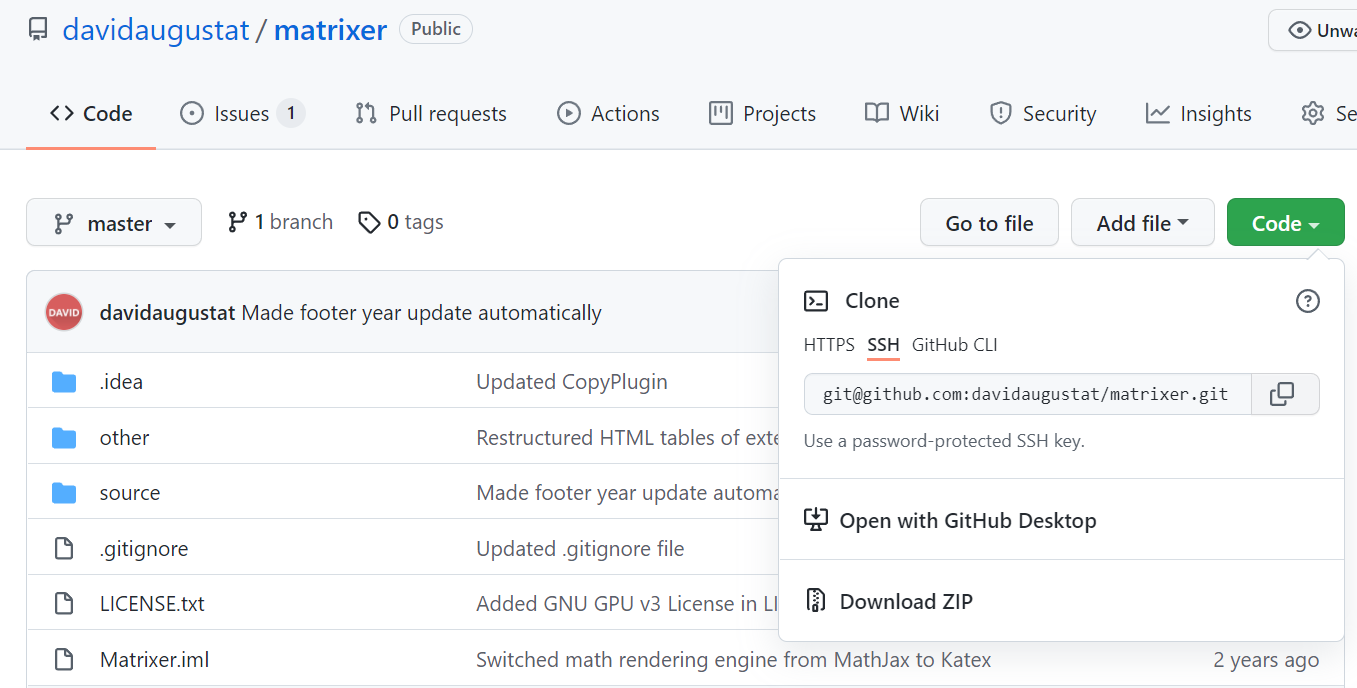
When cloning a repository, please make sure that you always copy the clone link with the SSH option. If you use the HTTPS link, you won’t be able to use SSH to clone the repository.
Remark: If this doesn’t work, please make sure that you select the option “Use external OpenSSH” while installing Git for Windows, like shown in this Screenshot. Otherwise, Git might not find your SSH key.
And that’s it!
Now you know how to configure SSH and generate an SSH key on Windows 11. I hope I could help you with this tutorial.
One last remark: Please make sure that nobody gets hands on your private key (the file C:\Users\%username%\.ssh\my-new-github-ssh-key). If they have your private key, they have full access to your GitHub repositories. If you notice that someone stole your private key, immediately delete it from the GitHub settings and generate a new key.