How to Self-Host a HedgeDoc Instance Using Docker: Installation, HTTPS, Backups, Updates, User Management
HedgeDoc is a collaborative markdown editor that can be accessed via a web interface. It is practical for note-taking and for creating texts with multiple people simultaneously working on the document. Since HedgeDoc is open source, you can host it on your own server. This is exactly what I am doing. I mostly use my HedgeDoc instance to take notes and for assignments at university.
Since all guides on hosting a HedgeDoc instance I found online lack important steps like setting up your own domain or creating backups, I decided to create my own guide on HedgeDoc self-hosting.
In this guide, I will first show you how to set up HedgeDoc using Docker Compose and how to manage users on your instance. Then I show how to create a more advanced setup with a custom domain and HTTPS using a reverse proxy. Afterward, I explain how to create backups of your HedgeDoc instance. In this tutorial, I use HedgeDoc 1.9.9, which is the latest stable release at the time of writing.
Installation Using Docker Compose
The easiest way to run a HedgeDoc instance is by using Docker Compose. For this tutorial, I assume that you already have Docker and Docker Compose installed on your server. If not, you can follow this tutorial first.
The official HedgeDoc documentation provides an example docker-compose.yml file. However, we will make some modifications to this file, as it hard-codes an outdated version of PostgreSQL and uses default settings that I don’t recommend.
Instead, we will use the following file:
# hedgedoc/docker-compose.yml

version: '3'
services:
  database:
    image: postgres:16-alpine    # Always uses latest minor version of PostgreSQL 16
    environment:
      - POSTGRES_USER=hedgedoc
      - POSTGRES_PASSWORD=password
      - POSTGRES_DB=hedgedoc
    volumes:
      - database:/var/lib/postgresql/data
    restart: unless-stopped

  app:
    image: quay.io/hedgedoc/hedgedoc:latest
    environment:
      - CMD_DB_URL=postgres://hedgedoc:password@database:5432/hedgedoc
      - CMD_DOMAIN=192.168.178.103    # change this
      - CMD_PORT=3000
      - CMD_URL_ADDPORT=true
      - NODE_ENV=production
      - CMD_ALLOW_ANONYMOUS=false
      - CMD_ALLOW_ANONYMOUS_EDITS=true
      - CMD_DEFAULT_PERMISSION=private
      - CMD_ALLOW_EMAIL_REGISTER=false
      - CMD_ALLOW_GRAVATAR=false
    volumes:
      - uploads:/hedgedoc/public/uploads
    ports:
      - 3000:3000
    restart: unless-stopped
    depends_on:
      - database
volumes:
  database:
  uploads:
Create a directory called hedgedoc anywhere on your server and create a new file docker-compose.yml inside this folder. Then save the above contents into this file. Please replace CMD_DOMAIN=192.168.178.103 with the IP address of your server. (We will add a domain later in this post.)
This file sets up a HedgeDoc instance on port 3000 of your server.
You might be worried about the POSTGRES_PASSWORD=password line, as this seems to be an insecure password. However, this password doesn’t really matter since the PostgreSQL server will only be accessible from within the local Docker network of the HedgeDoc instance. This means that the database server cannot directly be accessed from outside anyways.
As you can see, two volumes are created: database and uploads. The first one is for storing the PostgreSQL database. the latter stores the images uploaded through the HedgeDoc interface.
As you can see, I have added some configuration options:
-
NODE_ENV=productionTo make sure that the Node.js server executes in production mode. -
CMD_ALLOW_ANONYMOUS=falseTo prevent anonymous users from creating notes on your server. -
CMD_ALLOW_ANONYMOUS_EDITS=trueTo allow anonymous users to edit publicly shared notes, given that they know the URL of the note. -
CMD_DEFAULT_PERMISSION=privateTo make sure that notes are private by default. -
CMD_ALLOW_EMAIL_REGISTER=falseTo prevent foreign users from creating an account on your instance. -
CMD_ALLOW_GRAVATAR=falseTo prevent the server from sending the users’ email addresses to Gravatar to fetch their Gravatar profile picture.
I think these settings are more adequate for most instances, but of course, you can configure your instance as you like. The full list of configuration options can be found here.
To now get your HedgeDoc instance up and running, execute the following command from within the directory of the docker-compose.yml file:
docker compose up -d
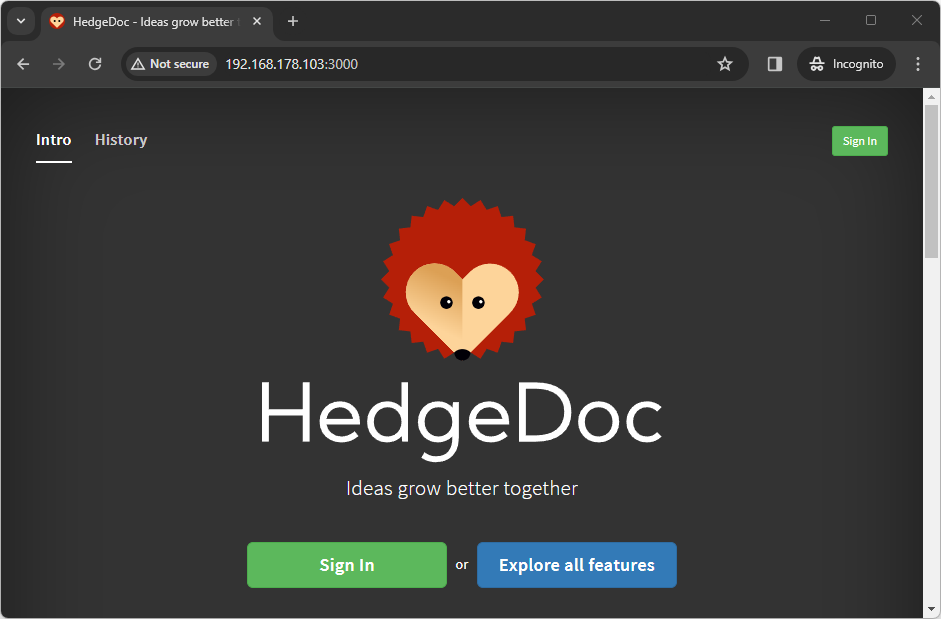
Then navigate to http://[server-ip-address]:3000 and you should be greeted by the following website:
Creating and Deleting Users
You may have noticed that you are not able to log in to your new HedgeDoc instance. The reason is that there are no user accounts yet. We need to create one first using the command line.
To create users, you can execute the manage_users tool from within the HedgeDoc Docker container:
docker exec -it hedgedoc-app-1 /hedgedoc/bin/manage_users --add john@example.com
where hedgedoc-app-1 is the name of the HedgeDoc Docker container and john@example.com is the email address of the user you want to create.
The tool then prompts you to choose a password for the user. After you confirm this, the user has been created.
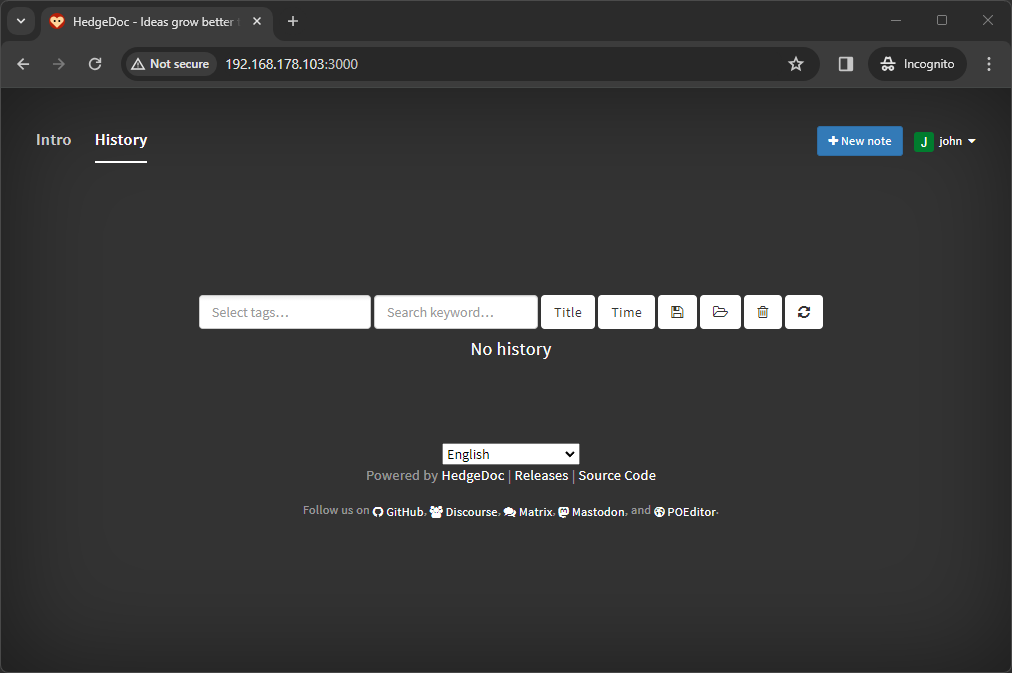
You can now use this account to log in to HedgeDoc. Afterward, you should see the following home page, where you can create a new note:
In the same way, you can delete an existing user. Just run
docker exec -it hedgedoc-app-1 /hedgedoc/bin/manage_users --del john@example.com
If a user forgets their password, you can change it by the following command:
docker exec -it hedgedoc-app-1 /hedgedoc/bin/manage_users --reset john@example.com
Setting up Domain, HTTPS, and Reverse Proxy
Our current HedgeDoc setup is great when used in a local network. However, when you intend to host HedgeDoc on a public server, this setup has a few drawbacks:
- It is not associated with a domain like
hedgedoc.example.com. - If you want to use port 80 or 443 for HedgeDoc, you cannot run any other application on this port on the same server.
- There is no HTTPS encryption, i.e., the password and all notes are transmitted in plaintext.
We can solve all these issues at once by using a reverse proxy that handles all this for us. In our case, we will use the Nginx Proxy Manager, which is a super easy way to set up a reverse proxy.
We will set this up as a separate Docker Compose project since the reverse proxy can be shared among many Docker containers from various applications running on your server.
Setting up Nginx Proxy Manager
If you already have Nginx Proxy Manager running on your server, you can skip to the next section.
Create a directory nginx-proxy-manager on your server and paste the following contents into a new file called docker-compose.yml:
# nginx-proxy-manager/docker-compose.yml

version: '3.8'
services:
  app:
    image: 'jc21/nginx-proxy-manager:latest'
    restart: unless-stopped
    ports:
      - '80:80'    # HTTP
      - '81:81'    # Admin Panel
      - '443:443'  # HTTPS
    volumes:
      - ./data:/data
      - ./letsencrypt:/etc/letsencrypt

    networks:
     - nginx-proxy-manager-network

networks:
  nginx-proxy-manager-network:
    external: true
This creates an nginx-proxy-manager container and connects it to a Docker network nginx-proxy-manager-network. The external: true does not mean that this network is accessible from the internet. Instead, it means, that other containers outside the current Docker Compose application can join the network. Thus, the HedgeDoc container can use the nginx-proxy-manager-network network to communicate with the reverse proxy container.
We need to create this Docker network manually by running the following command:
docker network create -d bridge nginx-proxy-manager-network
Now spin up nginx-proxy-manager by running
docker compose up -d
from the nginx-proxy-manager directory.
Now navigate to http://[server-ip-address]:81/login, where you are greeted by the Nginx Proxy Manager admin panel:
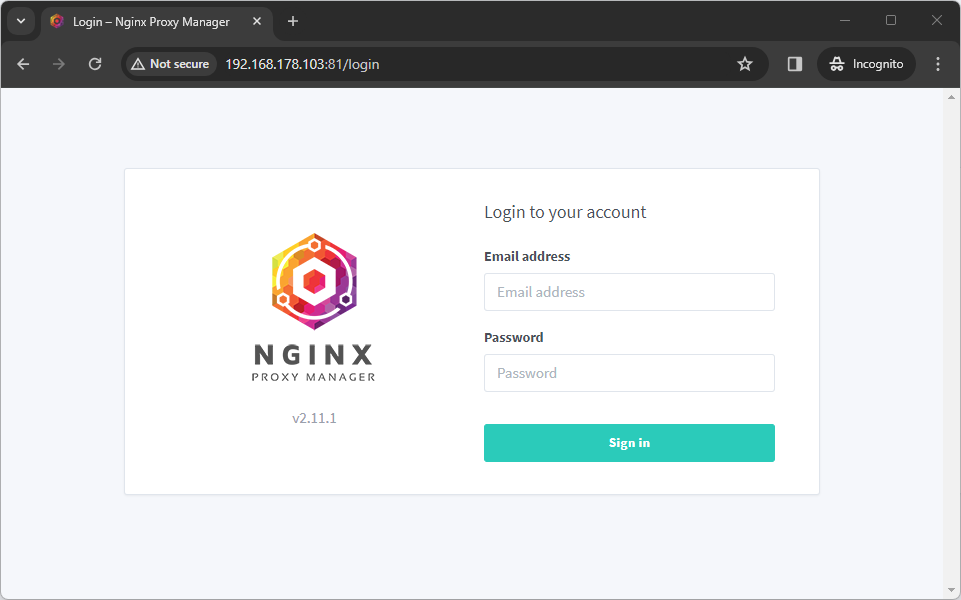
Initially, you need to log in with the following default credentials:
- Email: admin@example.com
- Password: changeme
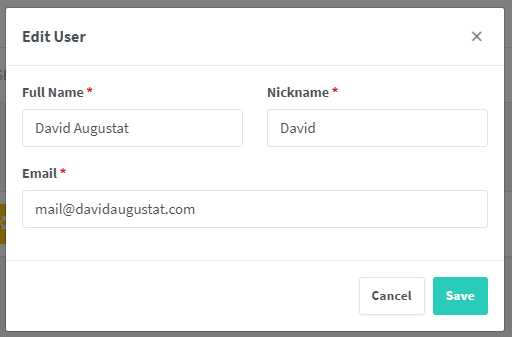
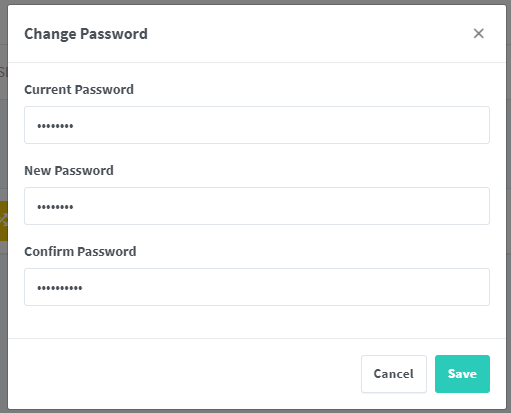
After you log in, you are prompted to change the username, email, and password:
Your Nginx Proxy Manager instance is now up and running.
Connecting HedgeDoc to Nginx Proxy Manager
To use HedgeDoc together with Nginx Proxy Manager, we need to make some changes to the HedgeDoc docker-compose.yml file:
- Don’t expose port 3000 directly. Instead, connect the containers to the
nginx-proxy-manager-networkDocker network we just created. This way, the containers can talk to thenginx-proxy-managercontainer. We also create an additional networklocalwhich is used within one instance to communicate between the database container and the HedgeDoc container. - Instead of an IP address, we now use a domain on which we want to serve HedgeDoc. We can specify this domain using the environment variable
CMD_DOMAIN=hedgedoc.example.com. - Set
CMD_PROTOCOL_USESSL=true. This causes the URLs for embedded resources to be prepended withhttpsinstead ofhttp. The actual SSL configuration will take place in Nginx Proxy Manager. - Set
CMD_URL_ADDPORT=false, since we will now use the standard 443 HTTPS port, which does not need to be added to the URL.
After applying the changes, we end up with the following docker-compose.yml file:
# hedgedoc/docker-compose.yml

version: '3'
services:
  database:
    image: postgres:16-alpine    # Always uses latest minor version of PostgreSQL 16
    environment:
      - POSTGRES_USER=hedgedoc
      - POSTGRES_PASSWORD=password
      - POSTGRES_DB=hedgedoc
    volumes:
      - database:/var/lib/postgresql/data
    restart: unless-stopped
    networks:
      - local

  app:
    image: quay.io/hedgedoc/hedgedoc:latest
    environment:
      - CMD_DB_URL=postgres://hedgedoc:password@database:5432/hedgedoc
      - CMD_DOMAIN=hedgedoc.example.com    # Change this
      - CMD_PROTOCOL_USESSL=true
      - CMD_URL_ADDPORT=false
      - NODE_ENV=production
      - CMD_ALLOW_ANONYMOUS=false
      - CMD_ALLOW_ANONYMOUS_EDITS=true
      - CMD_DEFAULT_PERMISSION=private
      - CMD_ALLOW_EMAIL_REGISTER=false
      - CMD_ALLOW_GRAVATAR=false
    volumes:
      - uploads:/hedgedoc/public/uploads
    expose:
      - 3000
    networks:
      - local
      - nginx-proxy-manager-network
    restart: unless-stopped
    depends_on:
      - database
volumes:
  database:
  uploads:

networks:
  local:
  nginx-proxy-manager-network:
    external: true
Now replace the contents of the original hedgedoc/docker-compose.yml file with these contents. Don’t forget to change the CMD_DOMAIN to a domain name you own.
Now we can restart the HedgeDoc instance by running the following commands from the hedgedoc directory:
docker compose down
docker compose up -d
However, when you go to http://hedgedoc.example.com (replaced by your own domain), no website shows up. The reason is that we need to perform two additional steps:
- Add an A record for the domain in the DNS
- Add a “Proxy Host” entry in Nginx Proxy Manager
Adding an A Record
To make the domain work, we first need to point our domain hedgedoc.example.com to our server’s IP address. To do this, we must log into the admin panel of our domain registrar and add an A record for our domain. In my case I use the domain hedgedoc.davidaugustat.com and my DNS configuration looks like this:
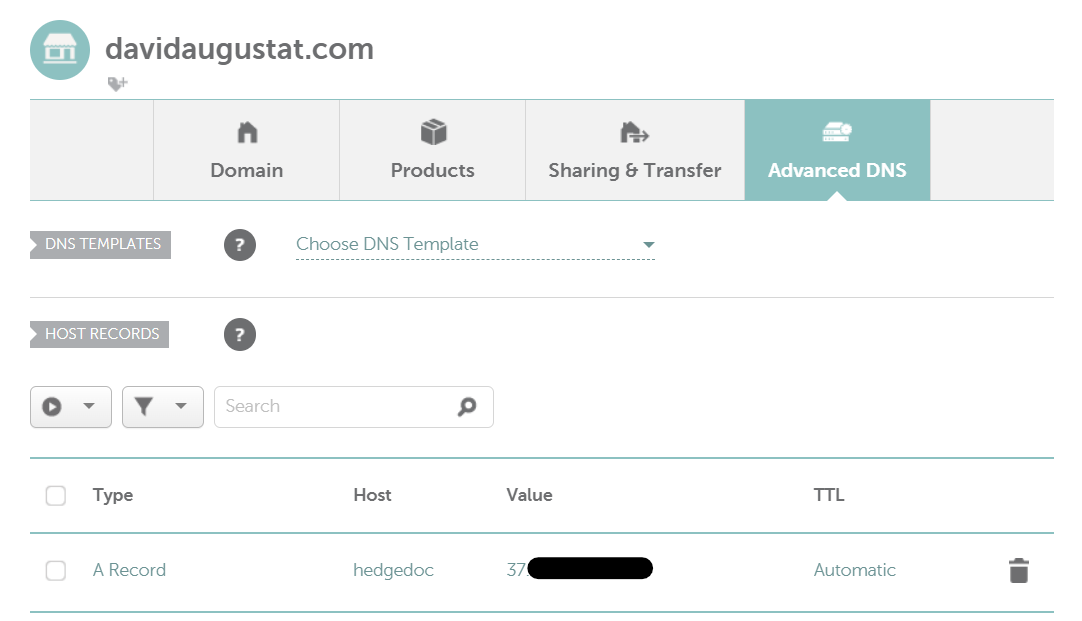
If you are wondering: The IP address is now different from the 192.168.178.103 I used before since I now use the public IP address of the server instead of the local one. If your server has only one IP address, just use that one for everything.
Adding a Proxy Host Entry in Nginx Proxy Manager
Go to the Nginx Proxy Manager dashboard at http://[server-ip-address]:81, log in, and then go to Hosts > Proxy Hosts. There, click the button “Add Proxy Host”.
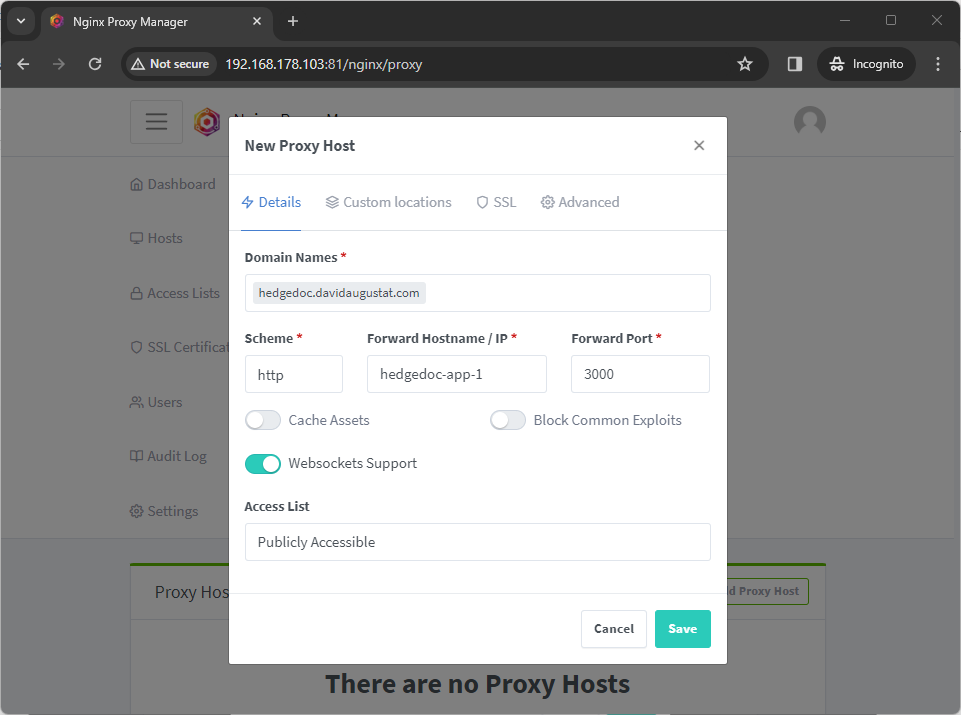
Fill out the “Details” tab as shown in the screenshot, but replace the domain with your own. The “Forward Hostname / IP” must be the name of the HedgeDoc Docker container (here hedgedoc-app-1), as the container name is also the hostname in the nginx-proxy-manager-network Docker network we created.
If you are unsure what the name of your HedgeDoc container is, you can run docker ps to list all running containers.
Please note that the “Scheme” must be http and not https, as this refers to the protocol our HedgeDoc Docker container uses to communicate with the reverse proxy. This does not mean that HedgeDoc will be served via HTTP (we will set up HTTPS in a moment).
It is also important that you enable the “Websockets Support” options, as HedgeDoc uses web sockets for real-time collaboration.
Now, to set up HTTPS, switch to the “SSL” tab and select “Request a new SSL Certificate”. This will automatically create a free Let’s Encrypt SSL certificate. You need to enter an email address, which is used to send a renewal reminder, in case the certificate expires. You can also tick the “Force SSL” option to automatically redirect HTTP requests to the HTTPS version.
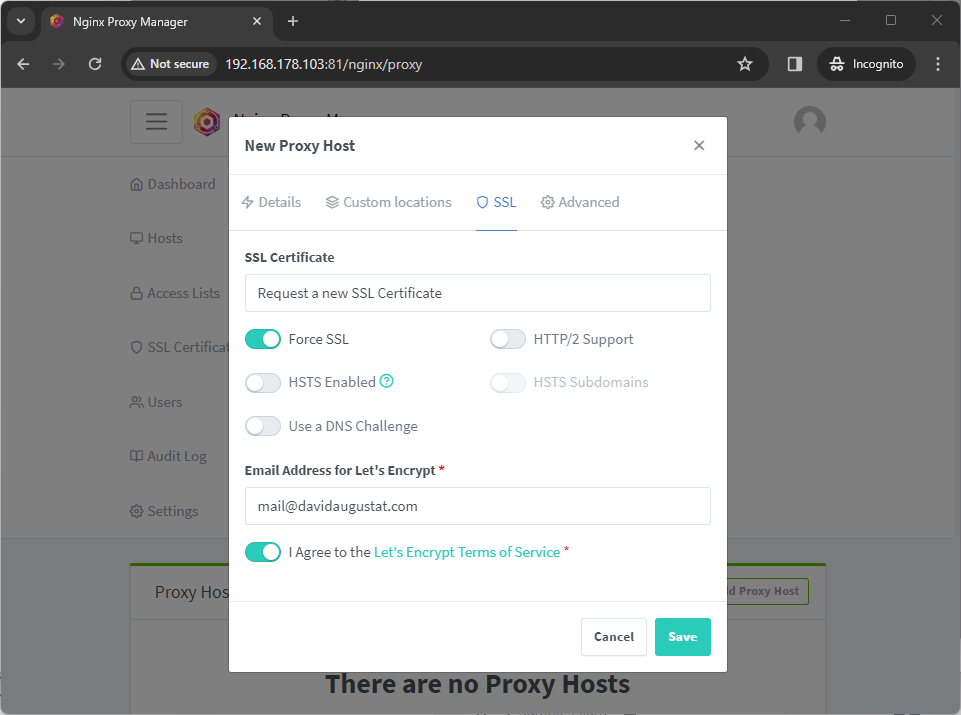
Now hit the “Save” button. This will take a few seconds since a new Let’s Encrypt certificate must be created.
If this step fails, please make sure that your server is publicly accessible from the internet. This is required to perform the HTTP-01 challenge, which is necessary for the certificate creation. If your server is inside a local network or an intranet, you can try to use the DNS-01 challenge by ticking the “Use a DNS challenge” option.
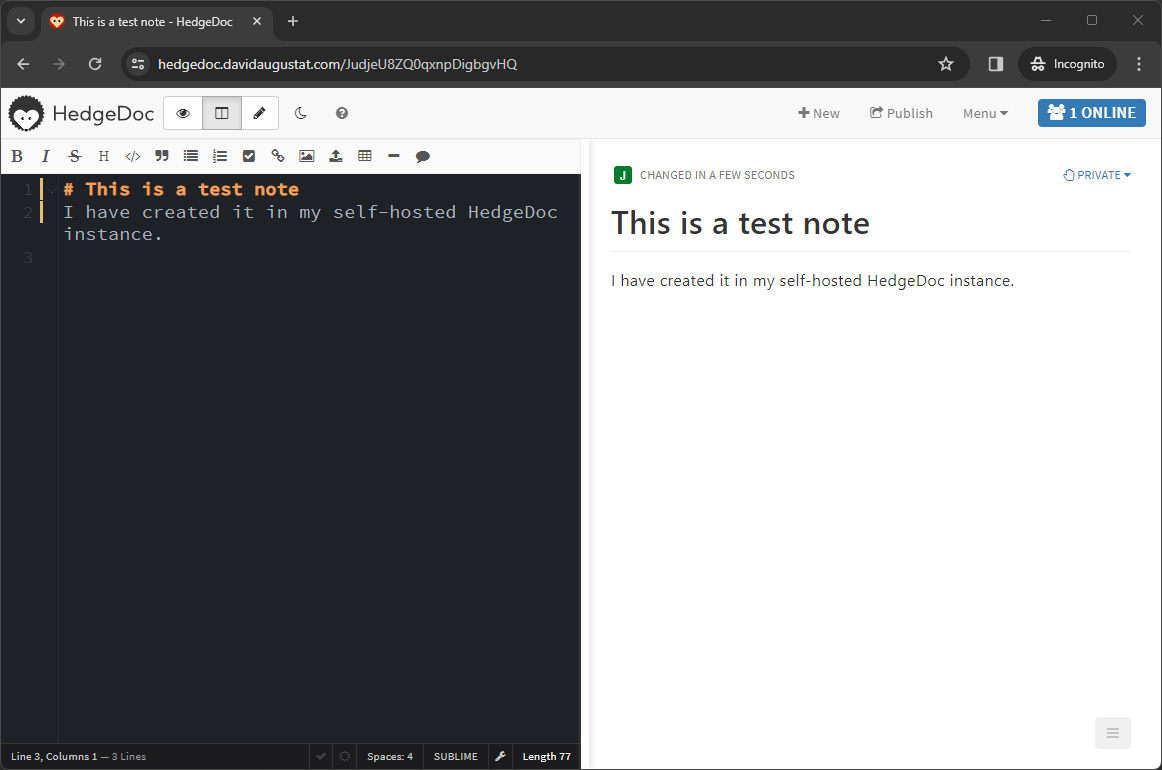
Now go to https://[your-domain] (in my case it’s https://hedgedoc.davidaugustat.com). You will then see the landing page of HedgeDoc. You can also log in and create notes:
Now your HedgeDoc instance is ready to use. Have fun!
Creating Backups
To back up a HedgeDoc instance, we need to save two things:
- The
uploadsDocker volume storing all uploaded images - The PostgreSQL database storing all the users and notes
To make the process as simple as possible, I have created Bash scripts for backing up and restoring HedgeDoc. To use them, clone the repository on your server with the following command:
git clone https://github.com/davidaugustat/hedgedoc-docker-backup-scripts.git
Preparation
Then navigate to the repository and open the config.sh file in your text editor.
#!/bin/bash
# Shared variables for backup and restore scripts

# Parameters for uploads volume (adjust according to your installation):
uploads_docker_volume_name=hedgedoc_uploads

# Parameters for PostgreSQL database container (adjust according to your installation):
database_docker_container_name=hedgedoc-database-1
hedgedoc_database_name="hedgedoc"
hedgedoc_postgres_user="hedgedoc"

# File names in the backup archive:
uploads_archive_file="hedgedoc_uploads_backup.tgz"
database_archive_file="hedgedoc_database_backup.sql"
Here you need to adjust the name of the uploads Docker volume, as well as the PostgreSQL container name, the database name, and the PostgreSQL username.
If you used the names from the docker-compose.yml file mentioned earlier in this blog post, you don’t need to change anything in this file.
Backing Up
To now create a backup, make sure that your HedgeDoc instance is running. Then execute the following command on your server inside the repository directory:
bash backup-hedgedoc.sh
This produces a file called hedgedoc_backup_YYYY-mm-dd_HH-MM-SS.tgz (with your current timestamp of course), which contains
- a backup of the PostgreSQL database as a
hedgedoc_database_backup.sqlfile - all files of the
uploadsvolume as ahedgedoc_uploads_backup.tgzfile.
You can now store this file in a secure place.
Restoring a Backup
The restore script assumes that you already have a HedgeDoc installation running in Docker containers. If you want to restore the data to a new installation, you have to create a blank HedgeDoc instance first.
Now make sure that the HedgeDoc instance is running (at least the PostgreSQL container). then run
bash restore-hedgedoc.sh hedgedoc_backup_YYYY-mm-dd_HH-MM-SS.tgz
This script restores the two Docker volumes of the installation from the hedgedoc_backup_YYYY-mm-dd_HH-MM-SS.tgz file.
The restored data should be available now in the HedgeDoc instance.
Updating HedgeDoc
Occasionally there are updates to HedgeDoc, which may contain security vulnerability fixes or new features. To update to the latest version, just run the following commands from the directory where your docker-compose.yml file resides:
docker compose down
docker compose pull
docker compose up -d
This pulls the latest version of all involved Docker images from the internet and restarts the containers. As we didn’t specify version numbers in the docker-compose.yml file, the latest versions of HedgeDoc and PostgreSQL will automatically be used.
It is recommended to create a backup before the update, just in case some data gets corrupted.
By the way, you can use the same commands to update Nginx Proxy Manager.
Bonus: Hiding the HedgeDoc Instance From Search Engines
In many cases, we don’t want our HedgeDoc instance to show up in search engines.
Unfortunately, HedgeDoc does not have a built-in feature to configure a robots.txt file.
However, we can use Nginx Proxy Manager to create a custom location for the robots.txt file.
Log into Nginx Proxy Manager and open the “Edit Proxy Host” window of our HedgeDoc proxy host. Then go to the “Advanced” tab and paste the following Nginx configuration:
location = /robots.txt {
  add_header  Content-Type  text/plain;
  return 200 "User-agent: *\nDisallow: /\n";
}
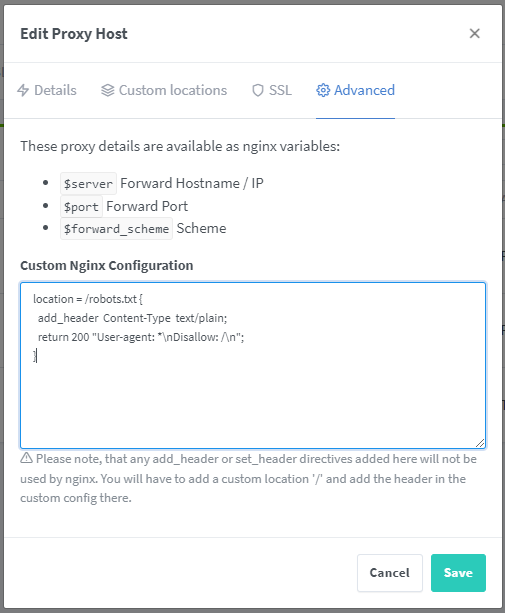
This creates a custom location for the path /robots.txt and serves a robots.txt file which forbids search engines to crawl any part of the HedgeDoc instance.
Hit “Save” and go to https://hedgedoc.example.com/robots.txt. You should now see the following contents:
User-agent: *
Disallow: /
And That’s It!
Now you know how to set up your own HedgeDoc instance, how to manage users on it, and how to create backups. Now you can use this HedgeDoc instance for note-taking and collaborative brainstorming. I hope that you find this guide helpful.
If you want to learn about all the cool features of HedgeDoc like LaTeX support, diagrams, and emojis, check out the official features documentation.