How to Take Ultra High Resolution Screenshots in Chrome (4K, 8K, …)
As a publisher, video creator or web developer you might need screenshots of a website, that have a higher resolution than your physical monitor. For example if you have a 1920 x 1080 (full HD) monitor, but you want your screenshots to be in 4K (3840 x 2160) or even 8K (7680 x 4320).
With traditional methods of taking a screenshot like Snipping Tool however, you can only take screenshots that have the same resolution as your monitor. But Google Chrome itself actually has a built-in functionality to capture higher resolution screenshots. In the following tutorial I will show you how to make use of it:
Instructions
Steps 3, 4 and 5 must only be done once. For the second time the process will be much shorter.
Step 1:
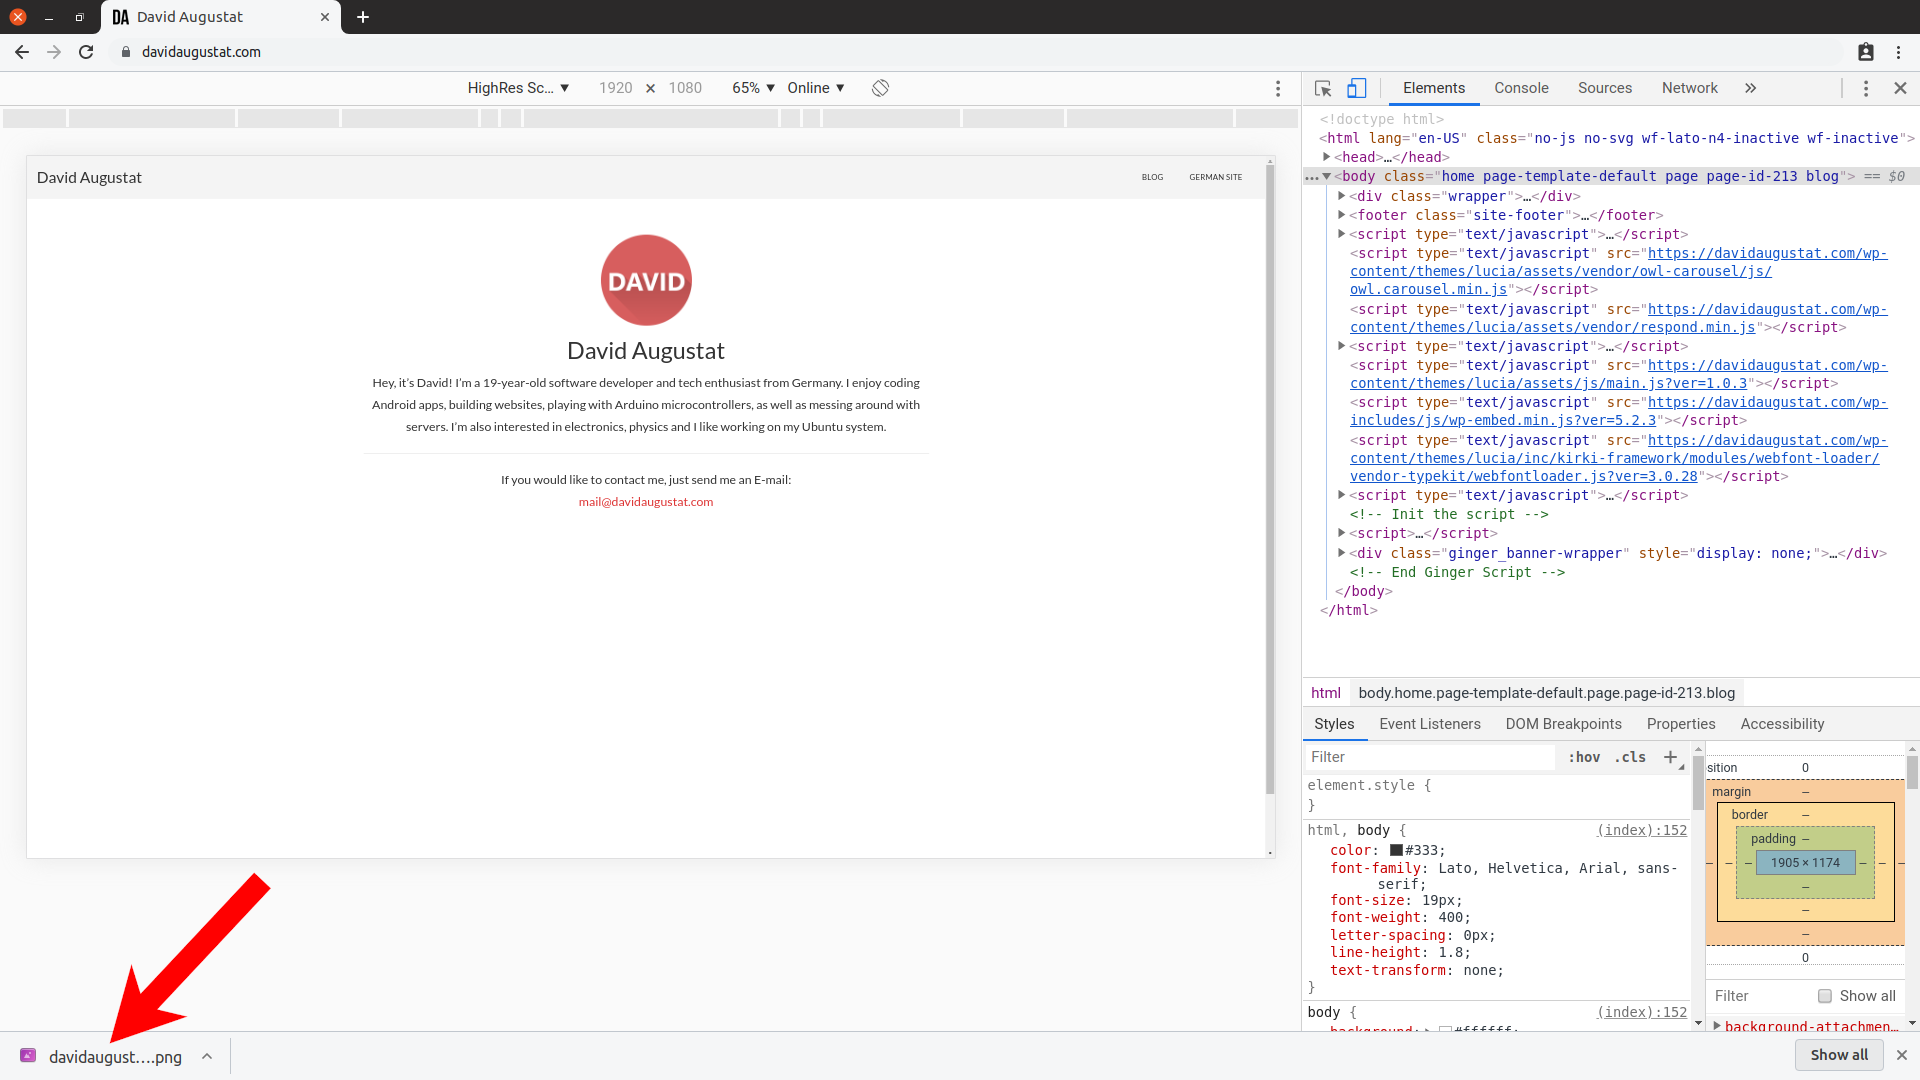
Open the website you want to screenshot in a Chrome tab and hit F12 on your keyboard. This will open the developer tools. All the code and stuff that appears might seem intimidating to you if you’re not familiar with web development, but don’t worry. We won’t mess with that and you can’t break anything.
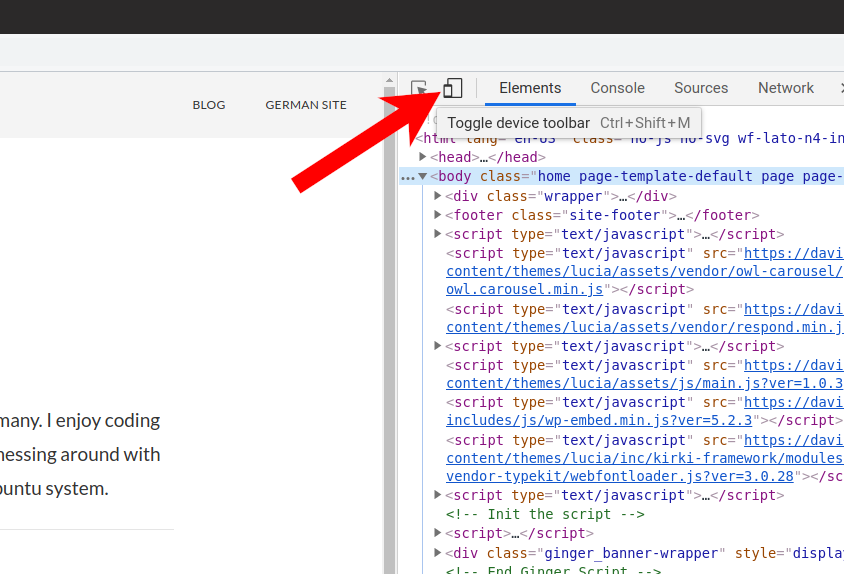
Step 2:
Click the “Toggle device bar” icon in the top left corner of the developers pane.
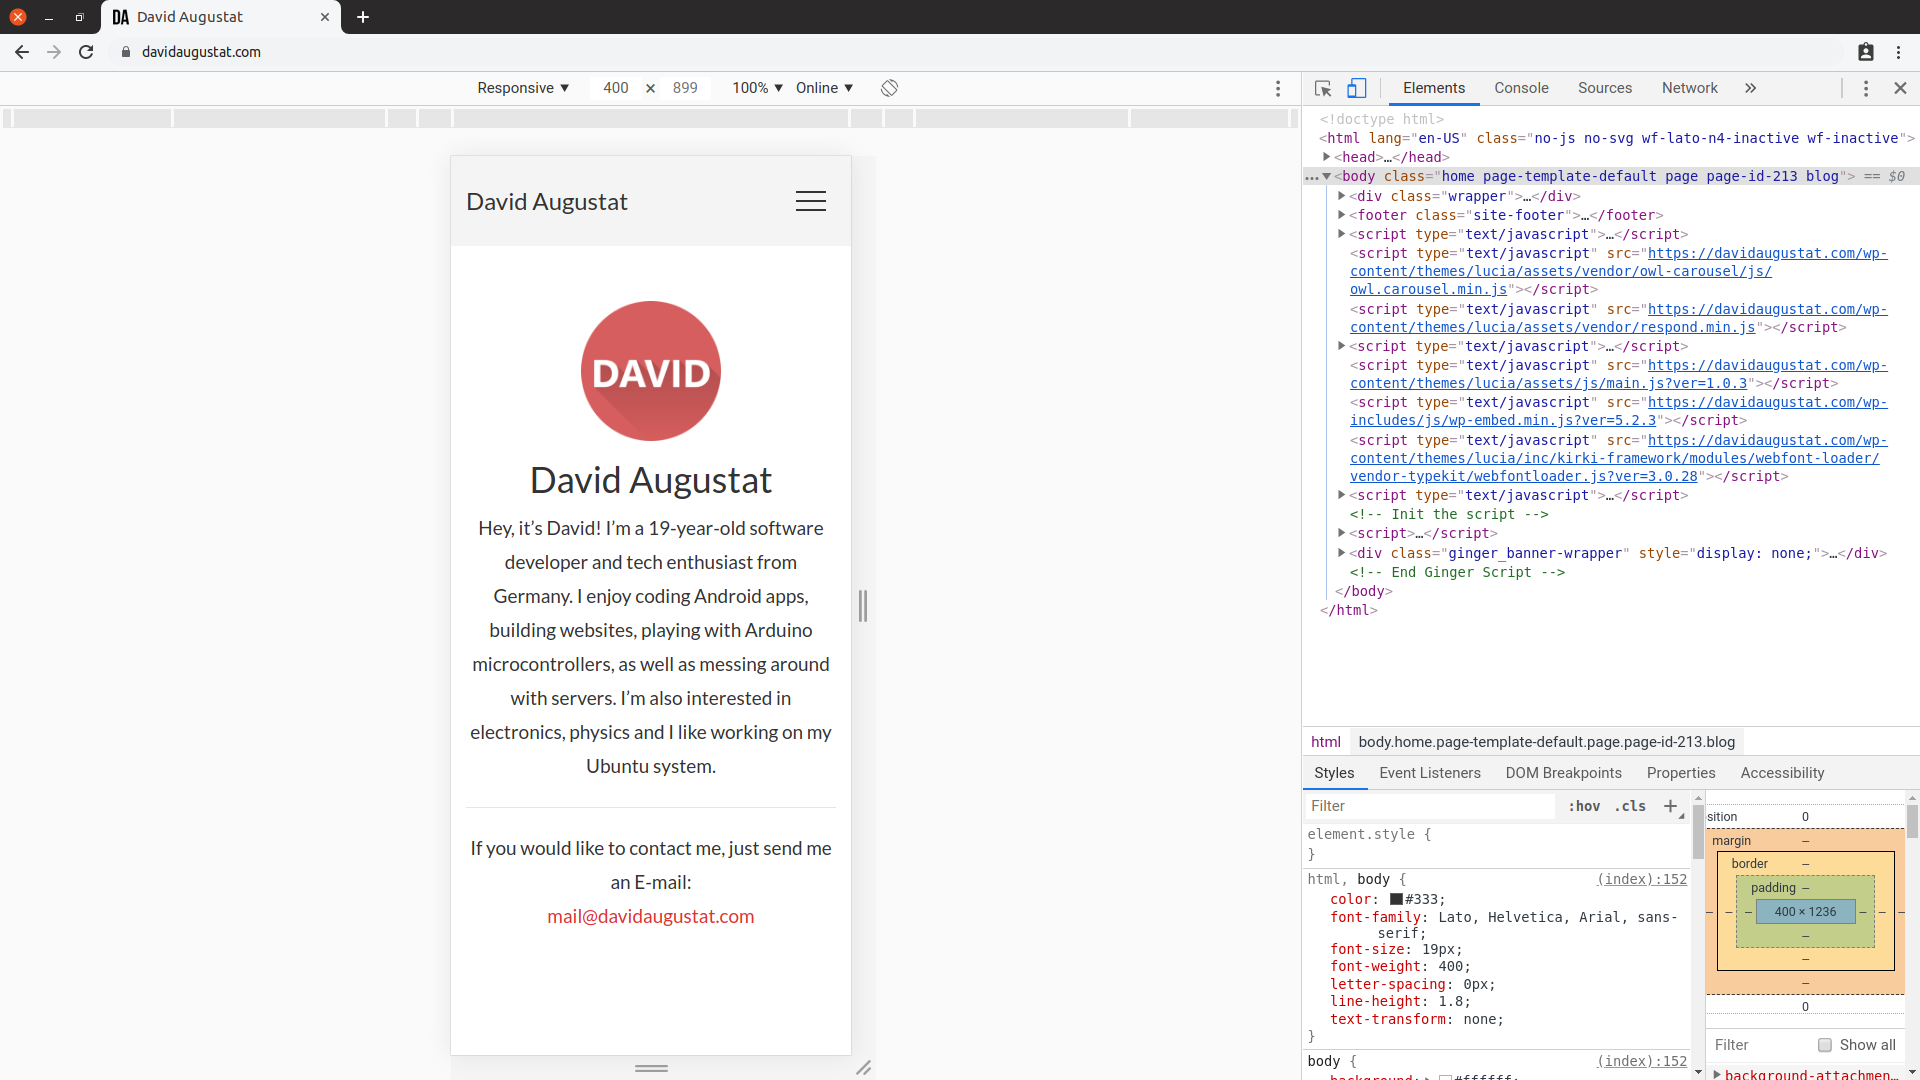
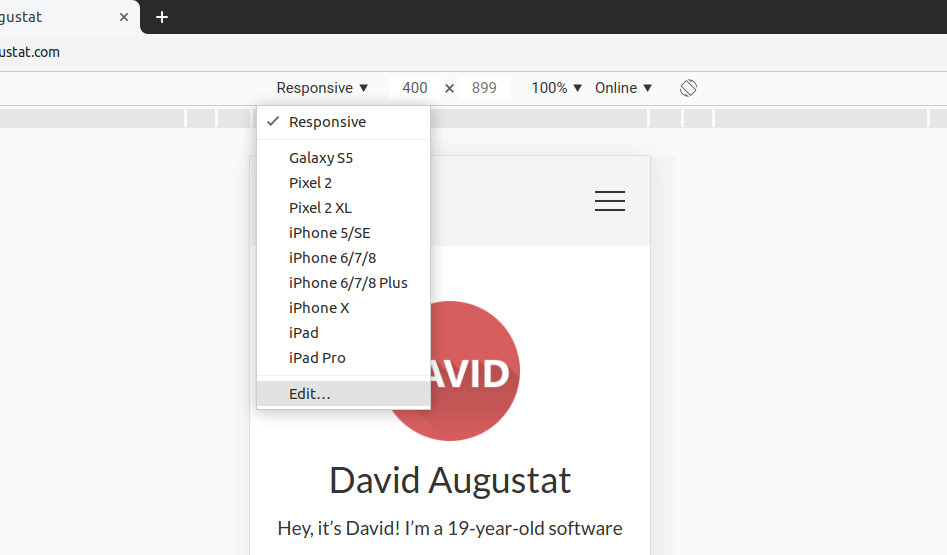
The view that appears now is a mode which helps web developers to test their websites on different screen sizes. The default screen size is “Responsive” but you can also choose other screen types in the dropdown menu.
Step 3:
However, we won’t use any of the presets but create our own screen type instead. Open the screen type dropdown menu and select “Edit…”.
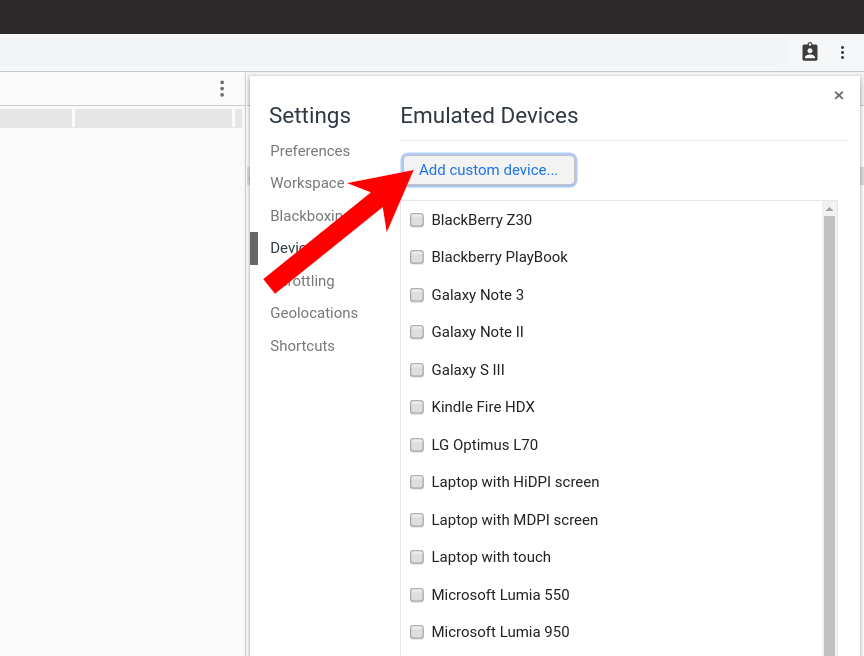
Step 4:
A new sidebar will appear which lists several phone models that can be used as screen types. We however can ignore them, and instead click on the “Add custom device…” button.
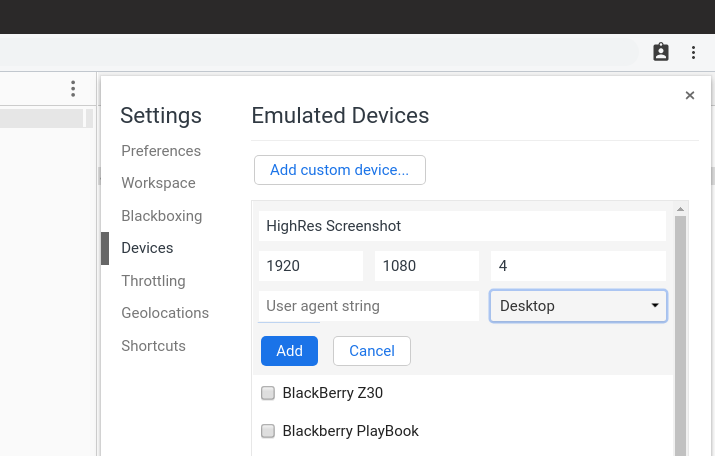
Step 5:
Now fill in the details for the new screen device. Pick a name like “HighRes Screenshot” and choose 1920 x 1080 as a screen resolution. Don’t worry, this won’t be the resolution of our screenshots but only determines the size of the text and the elements on the website. The screenshots will have a much higher resolution.
Now comes the important part: Choosing a device pixel ratio (DPR). The DPR determines the resolution of our screenshots in following way:
Screenshot width = 1920 * DPR
Screenshot height = 1080 * DPR
So the DPR acts as a resolution multiplier. When we choose the DPR to be 4.0 for example, the screenshot resolution will be:
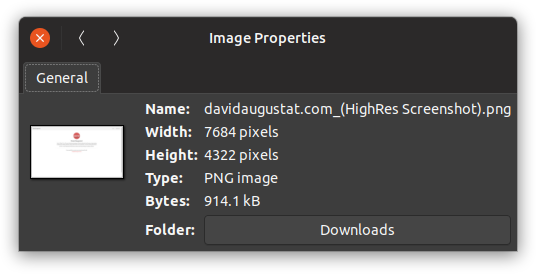
Width: 1920 * 4 = 7680 Pixels
Height: 1080 * 4 = 4320 Pixels
which is the resolution of 8K. Finally, change the device type from “Mobile” to “Desktop” an click the “Add” button to create your screen device.
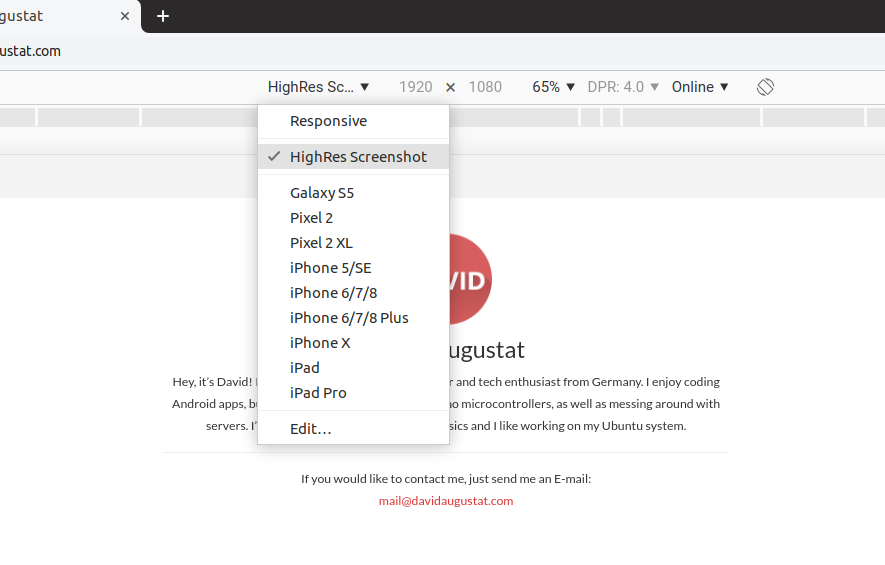
Step 6:
Now select your new device in the screen type drop down menu. This will render the website with the properties of the device.
Step 7:
To take the screenshot, click on the three dots at the top right side (at the arrow) and select “Capture screenshot”.

Depending on your machine it will take several seconds for Chrome to render the screenshot. When everything is done, the screenshot will be saved to your download folder.
That’s it!
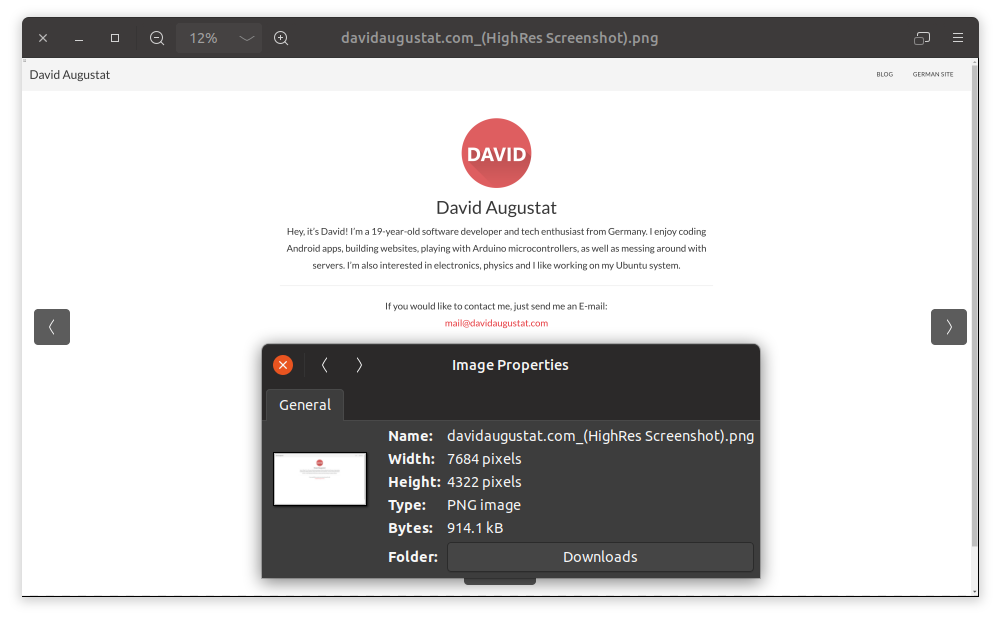
You’ve just created an 8K screenshot of a website. Check the image properties if you don’t believe me. Or download the screenshot here.
The screen device you created, will be stored in your browser and you don’t need to recreate it every time. Next time you want to take a high resolution screenshot, just hit F12, click the “Toggle device bar” icon, select your screenshot device and hit “Capture screenshot”. That’s a matter of 10 seconds!
Bonus: Full-Size Screenshots
If you select “Capture full size screenshot” in the menu instead, a screenshot of the entire website (from header to footer) will be created. This is useful, when you want to archive how a website looked at a certain point in time.
However, please note that the full-size screenshot feature does not work perfectly on every website. There also is a known issue that the right part of a full-size screenshot is partially cut off when a zoom level above 100% is used.